How To Do Sunset Time Lapse, And Other Advanced Techniques
5 min read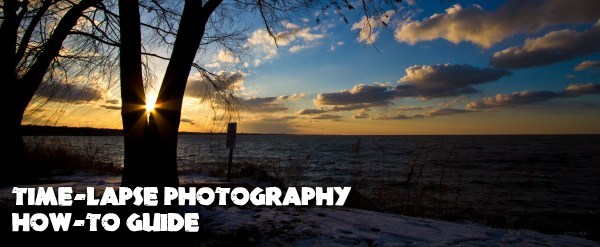
If you have opened this article it is likely that you have already tried to create some time lapses or have read our tutorial on How to make a time lapse and now you want to take the production of these videos to another level. Quite right?
Let’s face it, creating time lapses is not easy: there are thousands of technical notions to know about photos and videos to create the best time lapse possible; if we want to go further by adding difficulties (such as moving scenes) then it is essential to be fully prepared. So here are some tips to help you improve your time lapse technique.
TIME LAPSE AT SUNSET
Regardless of what we want to film, the quality of our time lapse will always depend on the quality of the images we shoot, so it is very important to do it in RAW and choose the right exposure. Also make sure you have some backup storage media, such as the Western Digital My Passport Wireless Pro (capable of copying data directly from the SD card) with Time Lapse Video Companies, and carry some spare batteries (or a dummie like the Jupio PowerVault Canon LP -E6). Among the most impactful time lapses there are certainly those of sunset or sunrise, very difficult to create due to the amount of technical obstacles to be overcome to have a smooth transition from day to night.
AUTOMATIC MODES
The simplest method would be to use the automatic or semi-automatic mode, such as aperture priority, and let the camera decide how to compensate for exposure as the light changes. The problem is that this method will almost certainly result in flickering (flickering of the exposure), so keep in mind that a step of post production will have to be dedicated to uniform exposure; moreover, using one of these modes means not having full control over the depth of field (aperture), motion blur (timing)
or noise (ISO). Ultimately it works, but the effort it requires in post production and the likelihood of failure if the camera fails to expose are major drawbacks.
MANUAL MANAGEMENT
The best option, albeit more demanding during production, is to manage the scene in manual mode, perhaps helping you with remote shots like the JJC TM-F2 or going directly in tethering using a laptop and a Tether Tools cable.
In this way, being careful, it is possible to manage the change of light throughout the time lapse, so as not to go crazy in post production. Another method, less demanding when shooting, is to change exposure more rarely, thus forming groups of images from the same exposure to be joined in post. I would not go below three groups to have a good result: one group for the day, I would divide the intermediate phase into two groups and the last group I would dedicate to the night.
ADD MOVEMENT: HYPERLAPSE
Movement within time lapse is not new, carts and other tools have been in use for some time. But when we talk about hyperlapse it is implied to refer to large movements, such as moving along a road or around a monument. This is certainly the most demanding technique, making it requires a lot of study and preparation, starting with the equipment.
Before thinking about the camera it is important to understand which support to use: a monopod is agile but a tripod is more stable, while a gimbal like the Zhiyun-Tech Crane 3 Lab helps to manage the movements of the camera on its axes. This is because the fluidity of the final product will depend very much on how we decide to stabilize the camera and on the precision of our movements in space.
In fact, to have the possibility it would be advisable to mark on the ground the intervals and the trajectory to follow. It is also essential to identify a reference point for the shot to always position in the same place, for example: if we wanted to make a hyperlapse around a statue, we could take its head as a reference point and then always position it in the same point of the frame. .
This is to give a sense of continuity to the time lapse, and also in this case the quality of the result will depend on our precision (and patience).
Only after all this comes the choice of the camera, although cameras like the Fuji X-T30 are sufficient in most cases, having a rather high resolution is important to create time lapses in 4K or even in 8K (which are shyly already appearing on YouTube).
At the moment the Sony Alpha 7R IV and the Panasonic S1R represent two excellent options, they are both full frame and offer a resolution of 61 megapixels and 47 megapixels respectively. This is because the software we will use to stabilize the final video will crop and modify the frame, so having some margin within which to make it work is certainly useful.
DRONES AND AIRPLANE TIME LAPSE
As they say, the only limit is the sky so why limit yourself to the ground? The drones currently on the market can shoot time lapses in complete autonomy, with the stability of a gimbal and the accuracy of the GPS system.
The preparation process for filming a time lapse of this type is slightly different from those seen before because there are other limitations and other possibilities. Limits that translate into flight range, no-fly zone, wind and weather conditions in general; possibilities that instead are infinite, such as being able to set precise trajectories or frame from otherwise impossible points of view.
Obviously it is important to choose a drone that can shoot in RAW and that actually has the integrated time lapse function, such as the DJI Mavic 2 Pro or the DJI Mavic 2 Zoom..
Before filming it is good to do some research, so make sure you have chosen a clean route, which does not intersect with no-fly zones. Also make sure to use a fully charged battery to maximize flight time (which hardly exceeds 25 minutes); however, certain drones allow you to repeat the route, so if you really need to change the battery you can use this function (which is also useful for time lapse of sunsets or spread over several days).
The most important thing in aerial photography, however, is not the quality of the
photos, but safety: make sure you understand the ENAC regulations before taking the flight.
Surely in post production you will have to add a touch of stabilization to correct those small movements that the drone has made due to the wind during filming or to eliminate any misalignment of the reference point, but the final result will certainly be worth it!
CONCLUSIONS
You will have noticed that there are not many technical notions; this is because we have already dealt with the basics and main notions in the aforementioned article How to make a time lapse.